In this article:
Learn how to schedule an audit in Logiqc so it runs once or repeats on a regular cycle.
Scheduling is done once on the Audit details form. The settings you enter here apply to every future occurrence of the audit.
Tip: For a detailed step-by-step guide, see the Academy tutorial below.
An audit is a structured review used to evaluate and improve performance, internal controls, risk management, and governance practices.
Scheduling audits helps ensure that internal controls are in place to manage risks, prevent fraud, and protect organisational assets.
Once scheduled, the audit appears in the Audit schedule tab. When it is time to begin, a task is assigned to the responsible person and the audit moves into the In progress tab on the Audit register.
Q: What permission do I need to schedule an audit?
A: You need the Schedule audits permission. The minimum licence type required is Approval.
Q: Where can I see a scheduled audit?
A: Once scheduled, the audit appears in the Audit schedule tab until it begins.
Q: Can I save the audit and come back later?
A: Yes. Depending on your permissions, you can save the audit as a draft. Draft audits appear in the Draft tab on the Audit register.
Before you start
Check the following:
- You have Logiqc Auditor.
- You have the required permissions to schedule audits, and an Approval licence or higher.
- You have an audit template ready to use.
Step 1: Open the audit scheduler
From most places in Logiqc, click Create, then select Audit:
Located in the bottom right corner of the screen.
Select Audit from the create menu to open the audit scheduler.
The scheduler opens on the Audit details page, ready for you to complete.
Step 2: Complete the audit details
Audit name: the name used for this audit and any recurring occurrences.
Then choose the audit type.
Audit source: Choose Internal or External.
- Internal: a staff member, employee, or engaged contractor.
- External: an independent third party, such as a regulatory body or external auditing firm. Enter the agency name in the field that appears.
Audit tool: Select the tool used to conduct the audit.
- Audit template: a checklist or questionnaire built in Logiqc. Select from the dropdown. If you need to create one first, see How to create and publish an audit template.
- Document: an existing file from the Documents register. Select from the field that appears.
Not applicable: select this if no formal tool is being used.
Related agreement (optional): link a relevant contract from the Contracts register.
Instructions: steps for conducting the audit. Clear instructions help the Action officer.
Step 3: Set the schedule
Click
Schedule audit
to open the Scheduler side panel.
Set the approval due date, then enter Action days and Approval days. The scheduler works backwards from the approval date to calculate the Start date and Action due date, shown in the timeline below the fields. Reminder emails are sent from the Start date.
Example: If the approval due date is April 30th and Action days is 3, the action due date is April 27th.
Select a frequency for how often the audit runs: Once off, Weekly, Fortnightly, Monthly, Quarterly, Six monthly, or Yearly.
Choose when the schedule ends
No end: Keeps creating future audits automatically.
End after: Stops the schedule after a set number of occurrences.
End by: Stops the schedule on a selected date.
Halt schedule: Stops future recurring audits from being created after the current one is completed.
Click OK to save the schedule.
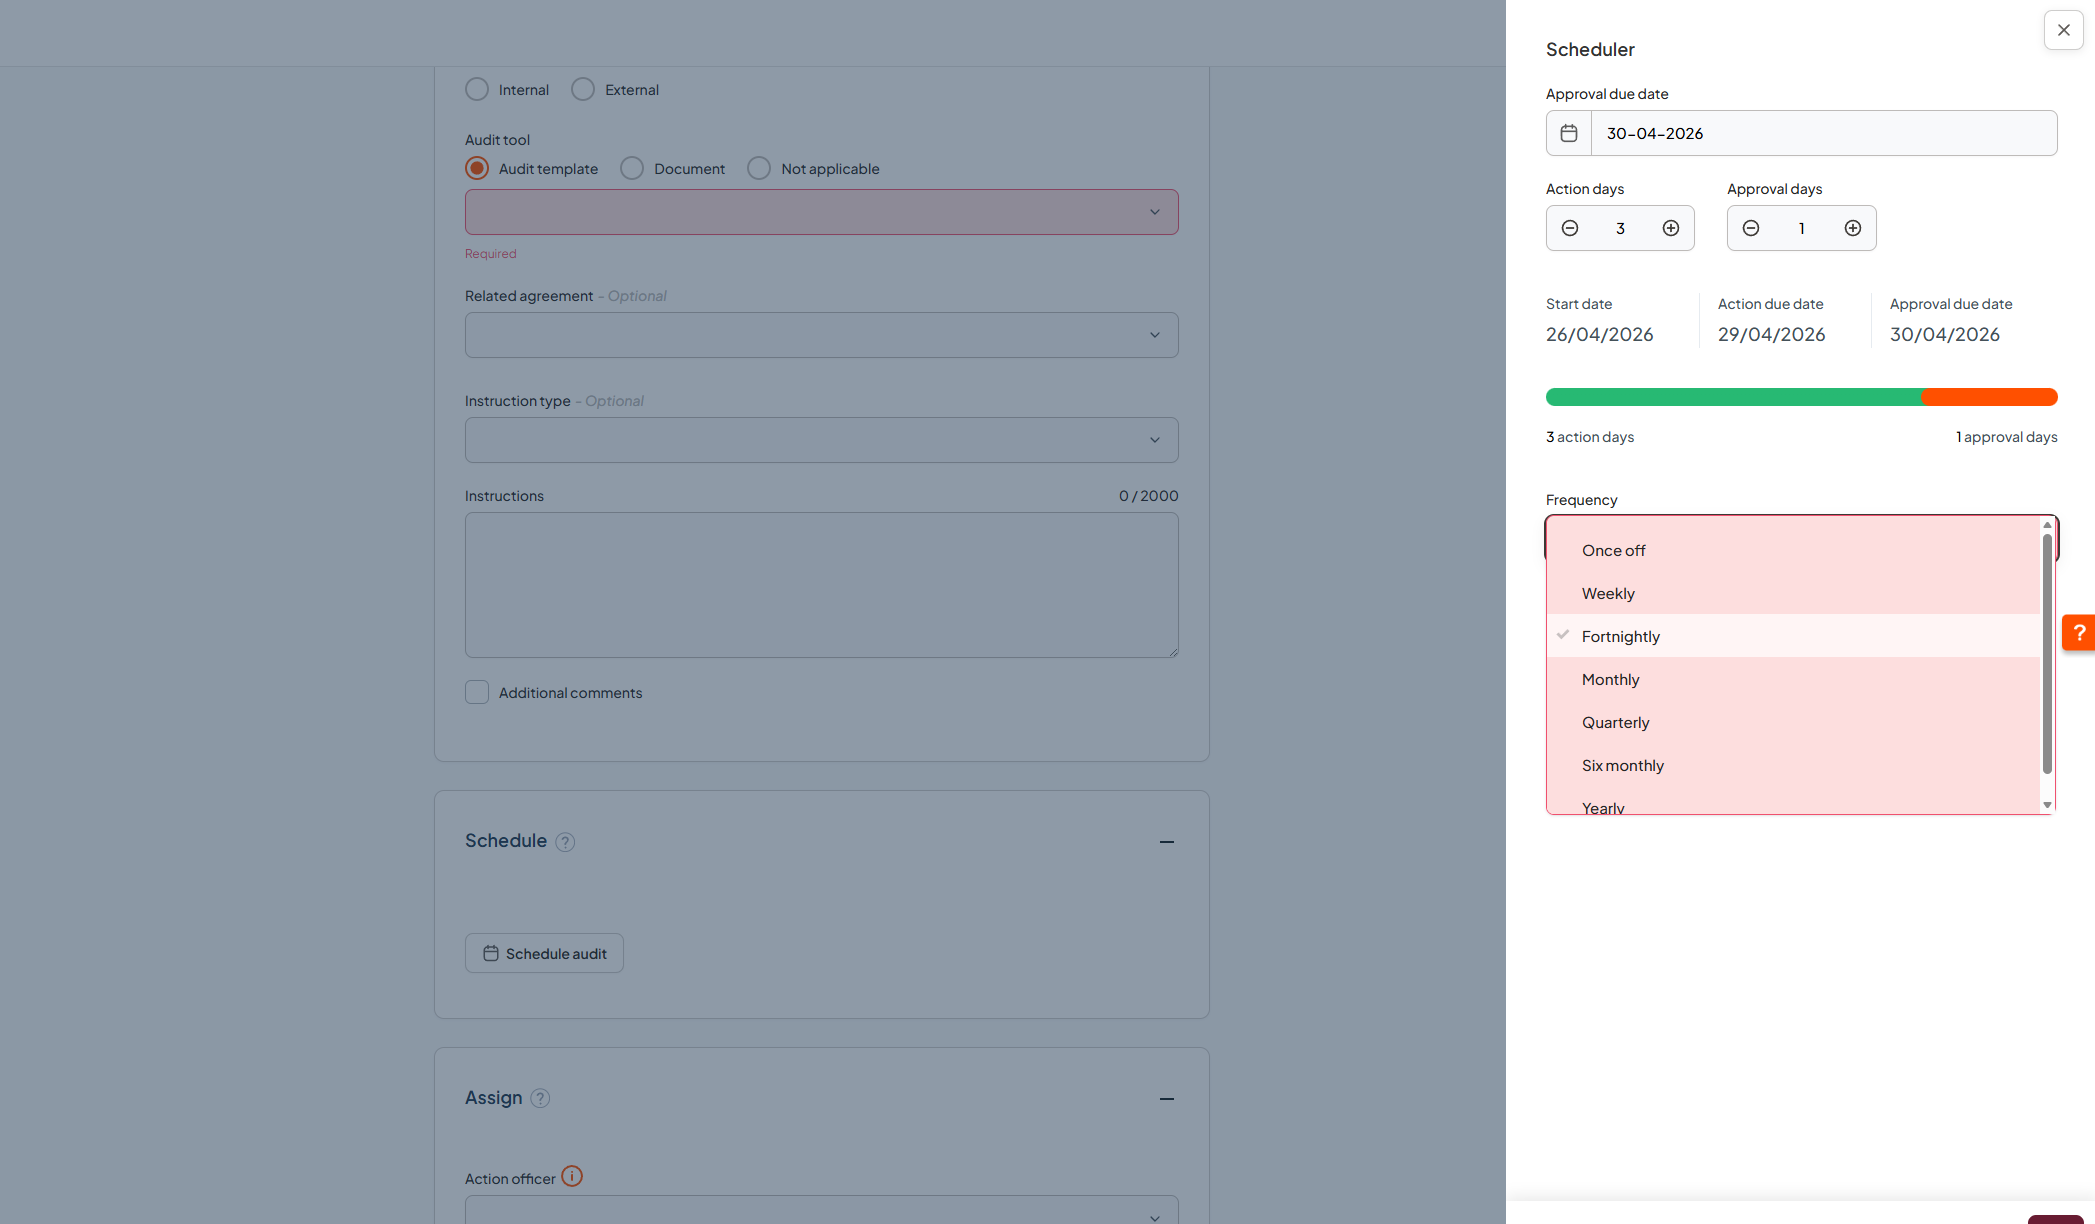
The scheduler shows due dates, frequency, recurrence, and when the schedule should end, all on one panel.
Step 4: Assign the audit
Select an Action officer to conduct the audit and an Approval officer to close it. You can also link the audit to a related business area and a related meeting for oversight.
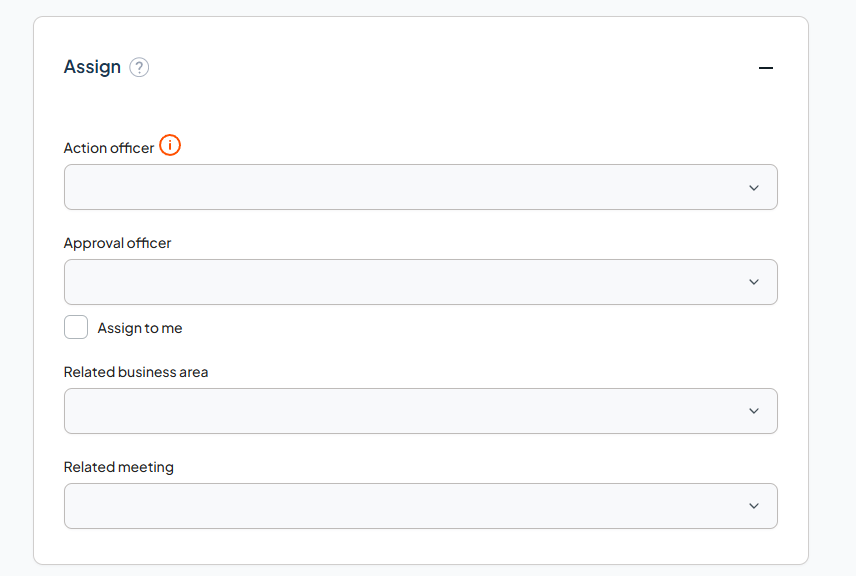
Assign the users responsible for completing and closing the audit.
Step 5: Set access
Use Access control to decide who can view the audit.
If you select Specify who can access, use these fields to build the access list:
- Teams: Add whole teams that need access.
- Individual users: Add specific users not already covered by a selected team.
- Who can view? Shows the final access list based on your selections. This list also includes users assigned to the item in the workflow.
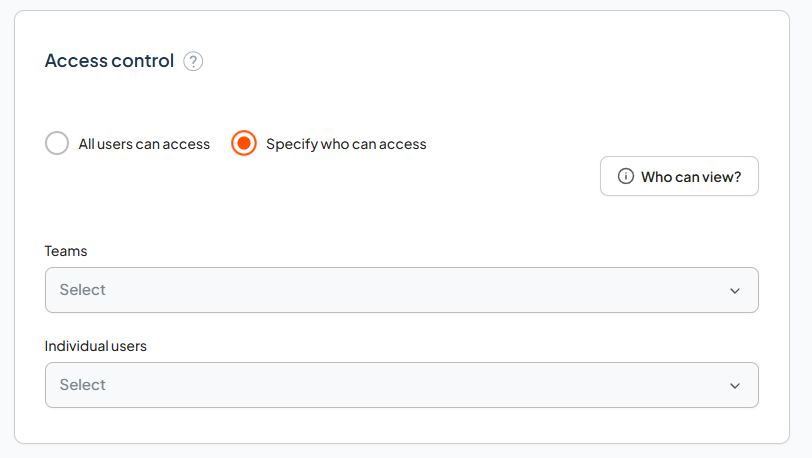
Set who can view the audit item before the schedule is activated.
Step 6: Attach records
To attach supporting records such as checklists or instructions, click
Attach
.
Give the record a meaningful name, then either click
Choose file
to upload from your computer, or if links are enabled, paste a URL in web format (https://) or Microsoft SharePoint format.
Attached records appear on the Records register once the audit is completed and closed. By default, they inherit the same viewing permissions as the audit.
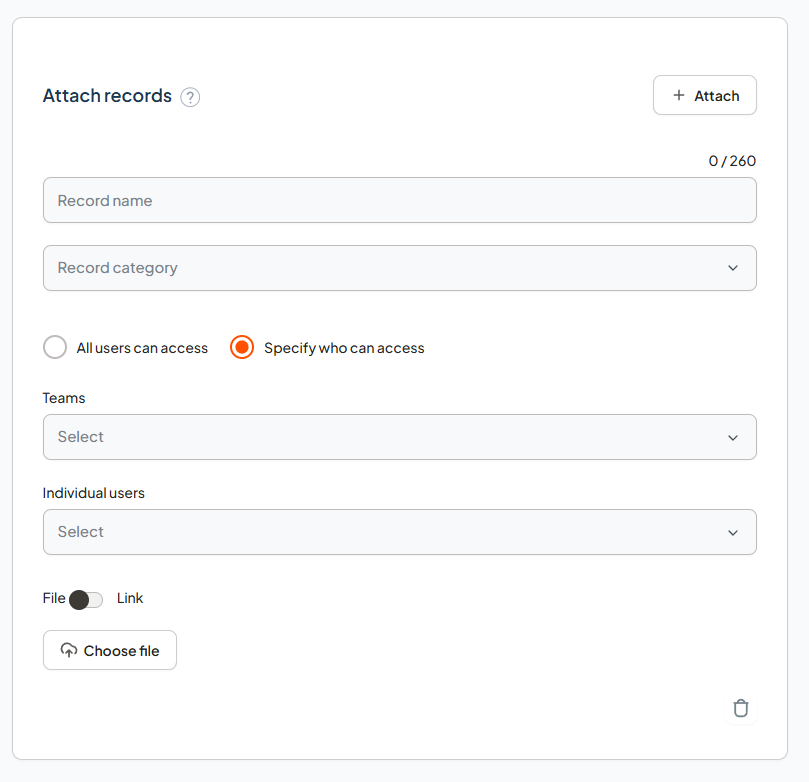
Attach files or links relevant to the audit, such as checklists, instructions, or supporting documents.
Step 7: Submit the audit
Click Submit to save the form and schedule the audit.
Troubleshooting
If something is not working as expected:
"I can't schedule the audit"
- Check that you have the Schedule audits permission
- Check that your licence type is Approval or higher
- Make sure the required fields have been completed before submitting
"More than one audit was created"
- Check how many users were selected as the Action officer
- If only one audit was intended, assign one lead Action officer instead of multiple users
What happens next
Once the audit is scheduled, the first audit is created as a future action and the schedule is ready to generate future audits based on the recurrence pattern you selected.
Added to the schedule
The audit appears in the Audit schedule tab as an upcoming audit.
Task assigned
When it is time for the audit to begin, a task is assigned to the responsible person.
Moves into Action
The audit becomes visible in the In progress tab in the Audit register and moves into the Action stage of the workflow.
Workflow continues
The Action officer completes the audit and the Approval officer closes it or delegates further steps.