What is a supplier?
Suppliers are companies or individuals who provide products or services to your organisation.
Why manage suppliers in Logiqc?
Products and services that you purchase from suppliers and then use to provide services to your clients and consumers can directly impact the quality of your services. To help ensure that the performance of those critical suppliers meet your requirements, the Suppliers register can be used to prompt regular and formal review.
The supplier management workflow
When a new supplier is added to the Suppliers register, it will move to the Supplier manager and then to the Supplier owner for checking and publishing. Learn more
Permissions required to add a supplier
You will need the following permission to add a contract:
- Add suppliers (minimum licence type required - Action)
How to add a supplier
Complete each section of the Supplier details form highlighted below. Click the links to learn how to complete each section.
- Supplier details
Select or create the supplier and set the next review date. - Supplier assessment
Document your initial evaluation of the supplier responding to the predetermined criteria set by your organisation. - Supplier performance notes
Enter any relevant notes about the performance of the supplier. - Assign
Select the Supplier manager and Supplier owner. - Access control
Select the teams and/or individuals who should be able to view the report. - Attach records
Upload any relevant records relating to the supplier. - System event history
A chronological record maintained by the system detailing entries and changes made to the form including links to any related items created by users.
Supplier details
Select the supplier that you want to designate as a 'preferred' supplier or create a new supplier with the + icon. The set the date for the next review following the initial assessment.

- Supplier name
Select the name of the supplier from the list or click the + icon to create a new supplier. The list displays all suppliers already created in the Contacts register. Information on supplier type and services provided will auto-populate based on the information already recorded in the supplier's contact form.
- Supplier type
This information will be filled in automatically based on the details already entered in the supplier's contact form. - Supplier review date
Select the date the supplier is to be next reviewed after the assessment required for the initial approval. - Services provided
This information will be filled in automatically based on the details already entered in the supplier's contact form.
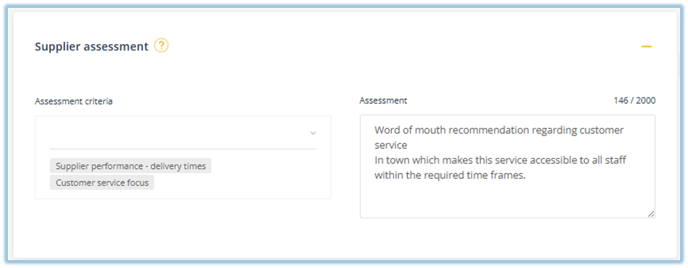
Supplier assessment
- Assessment criteria
This field provides a list of assessment criteria determined by your organisation that should guide your initial assessment of the supplier. - Assessment
During the initial assessment, select the criteria that the supplier meets and then describe why the supplier should be approved as a preferred supplier.
The Assessment field automatically updates when a new review of the supplier is completed.
Supplier performance notes
This component is designed to be used to track occasional performance issues as they arise once the supplier is approved. 
Assign
- In this component you set responsibilities for managing and approving the supplier. These choices should align with organisational delegations relating to the management of suppliers.

- Related business area
Select the business area the document relates to. - Related meeting
Select the meeting that has oversight responsibility for the management of the supplier. This is consistent with the premise that transparency in responsibility leads to greater accountability. - Supplier manager
Select the staff member who is responsible for managing the supplier. - Supplier owner
Select the staff member who is accountable for the supplier. If you are the Supplier owner, the Quick publish option will be available for immediate publishing of the supplier when you save the form.
- Use this function to notify relevant personnel that the supplier has been added to the system. Note: users sent notifications relating to the supplier will need to be included in Viewing permissions to see the document.
Access control
Set which users will have access to view the supplier. You can grant access to all users or specific teams and individual users.

- All users can access
Select this option if you would like all users to be able to view the item. - Specify who can access
Select this option to control which users can view this item. - Teams
Select the team/s who need to view the item. - Individual users
Select specific users (if they are not included in the selected team/s) who need to view the item.
Who can view?
Click this button to see a list of users who can see the item based on your selection. The list will also include those users assigned to the item in the workflow. Note: Users with system level permissions to see all items will also be included.
Attach records
This component enables you to upload or link related records.
This component enables you to attach records relating to the issue such as correspondence, emails, or photographs. Only users with permissions to see the item will be able to see attached records.
Click Attach to add a record.

Record name
When naming the record ensure the description is meaningful. For example, 'Correspondence re. SLAs - March 2022'.
File or Link
Click on Choose file and navigate to the record on your computer. If you have links enabled, toggle to change the control to add a URL to the record. The URL must be a in a web format (https://) or Microsoft Sharepoint format (https://<company>.sharepoint.com/...)
Go to topSubmit/save the form
The green Submit button will save the form and in most cases progress the item to the next stage of the workflow. The button label, however, will change depending on certain conditions to make it quicker to complete tasks. For example, if you assign the item to yourself to mange, the button label will change to 'Next' allowing you to mange the item without having to click through to another stage in the workflow.

- Create a related item - If you want to create a related/linked item after you submit the supplier form, you can select the relevant register in the Create a related item component. When you press Submit, the platform will launch a new item in the register you selected. The platform will display a link between the two items in the System event history.
- Quick publish - If you are the Supplier owner, you can skip the Manage and Approve stages by selecting Quick publish. The Quick publish option will immediately approve the supplier and publish it to the Supplier register.
- Submit/Next - The green Submit button will save the form, upload the supplier and move it to the Manage stage.
System event history
The System event history will be displayed once the incident is reported. It's a chronological record maintained by the system detailing entries and changes made to the form including links to any related items created by users.
Click the '+' control on the right to expand the line item to see more information.
