
In this article:
Add a supplier to create a controlled record of the organisation or individual providing products or services to your organisation. The supplier record captures the initial assessment, people responsible for ongoing oversight, access settings, supporting records, and the date the supplier is next reviewed.
After you submit the supplier, it moves through the Manage and Approve stages before being published to the Supplier register, unless you are the Supplier owner and use Quick publish.
Products and services supplied to your organisation can directly affect the quality of the services you provide. The Supplier register supports consistent initial assessment, ongoing performance monitoring, and scheduled formal review.
A new supplier moves to the Supplier manager for checking, then to the Supplier owner for approval and publishing.
Q: What is a supplier?
A: A supplier is a company or individual that provides products or services to your organisation.
Q: Can I create the supplier while adding the record?
A: Yes. If the supplier is not already available from the Contacts register, use the add control beside Supplier name to create it.
Q: Can I publish a supplier immediately?
A: If you are the Supplier owner, Quick publish is available so you can approve and publish the supplier without completing the Manage and Approve stages separately.
Before you start
Check the following:
- You have the Add suppliers permission (minimum licence type required: Action).
- You have enough information to assess the supplier against your organisation's criteria.
- You know who will act as the Supplier manager and Supplier owner.
Step 1: Go to Add a supplier
Open the Supplier register and select the option to add a supplier.
Navigation path
Select + Add supplier to open the Add supplier page.
Step 2: Complete the Supplier details
Select or create the supplier, then set the date for its next review.
| Field | Description |
|---|---|
| Supplier name | Select a supplier already recorded in the Contacts register. If it is not listed, use the add control beside the field to create it. |
| Supplier type | This is populated from the supplier's contact record. |
| Services provided | This is populated from the supplier's contact record. |
| Supplier review date | Select the date the supplier is next reviewed after the initial assessment and approval. This date triggers the future review workflow. |
Step 3: Complete the Supplier assessment
Use the assessment criteria set by your organisation to document why the supplier should be approved.
| Field | Description |
|---|---|
| Assessment criteria | Select the criteria used to guide the initial supplier assessment. |
| Assessment | Describe how the supplier meets the selected criteria and why it should be approved as a preferred supplier. |
Step 4: Add Supplier performance notes (optional)
Add any relevant performance observations already known about the supplier. After approval, use this section to record occasional performance issues as they arise.
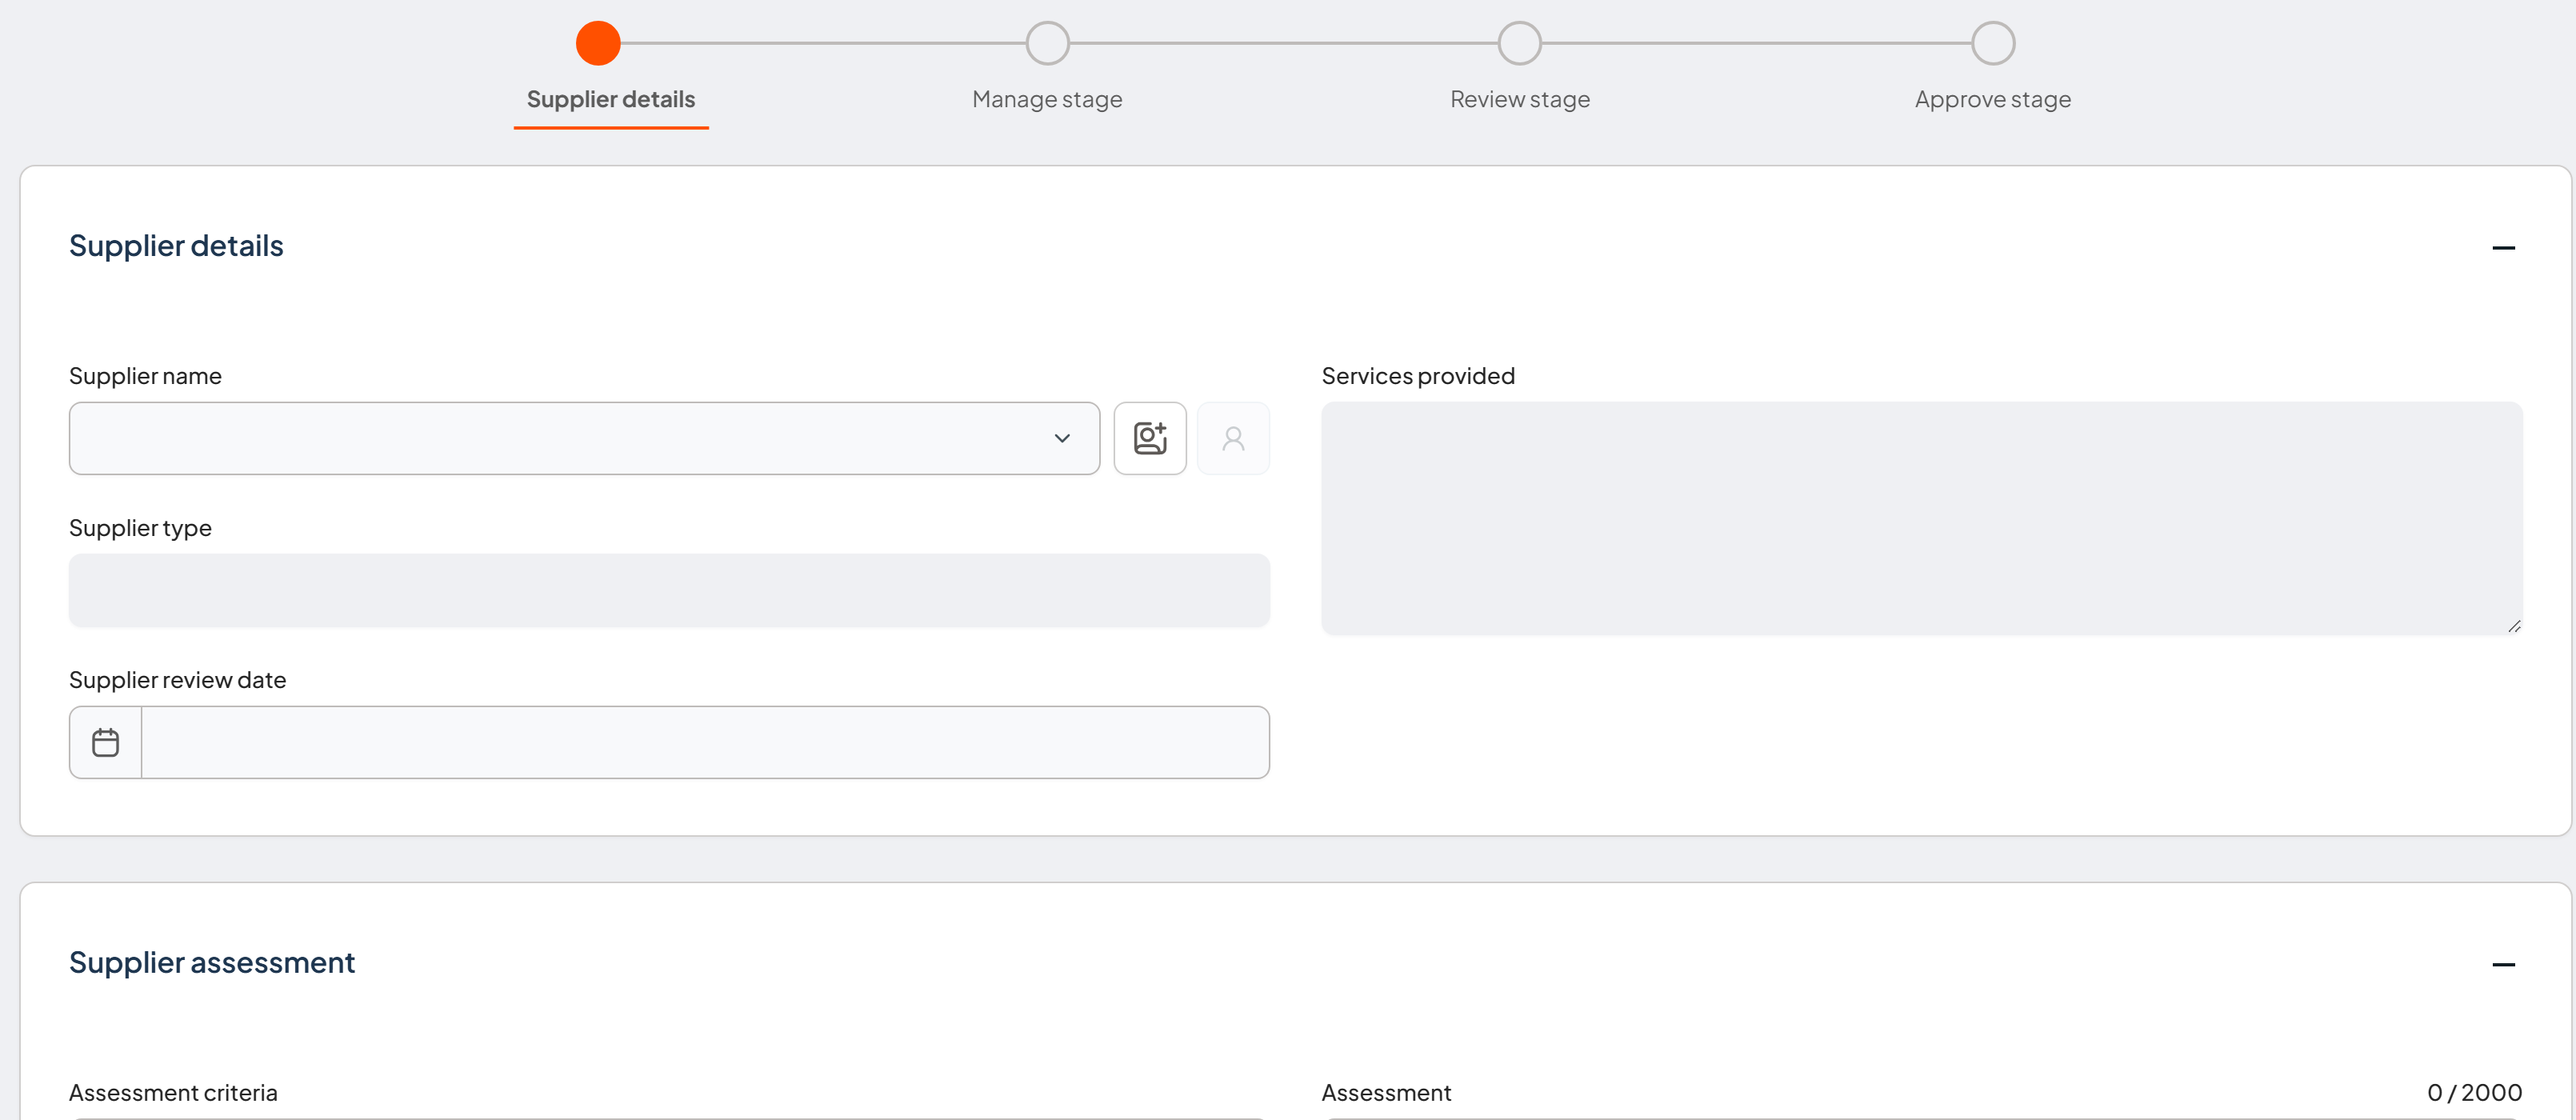
Complete the supplier details, assessment and any initial performance notes in their corresponding sections.
Step 5: Assign responsibility
Set responsibility for managing and approving the supplier in line with your organisation's delegations.
| Field | Description |
|---|---|
| Related business area | Select the business area the supplier relates to. |
| Related meeting | Select the meeting with oversight responsibility for managing the supplier. |
| Supplier manager | Select the person responsible for managing the supplier and coordinating reviews. |
| Supplier owner | Select the person accountable for the supplier and authorised to approve it. If you are the Supplier owner, Quick publish is available when you submit. |
Step 6: Set access control
Choose whether all users can access the supplier or only specified teams and individual users.
Step 7: Attach records (optional)
Select Attach to upload a supporting file or add a link. Use a meaningful record name, such as Correspondence about service levels, March 2026.
Read the article to find out more:
Step 8: Submit the supplier
Select the available completion option to save the supplier and progress it through the workflow.
Quick publish: available when you are the Supplier owner. This approves and publishes the supplier immediately.
Submit or Next: saves your changes and moves the supplier to the Manage stage. The label may change when you assign the next stage to yourself.
Create: to link the supplier to another register, use Add new item or Link items on the Related items tab below - Link items also lets you connect to something that already exists, which the top-bar Create button cannot do. Create is a shortcut for a brand-new linked item without leaving this page, and Logiqc records the relationship in the System event history either way.
Other sections
Once the supplier is saved, a Related items tab is available on the record. Select Add new item to create a new item in another register and link it back automatically, or Link items to search for and connect an existing one.
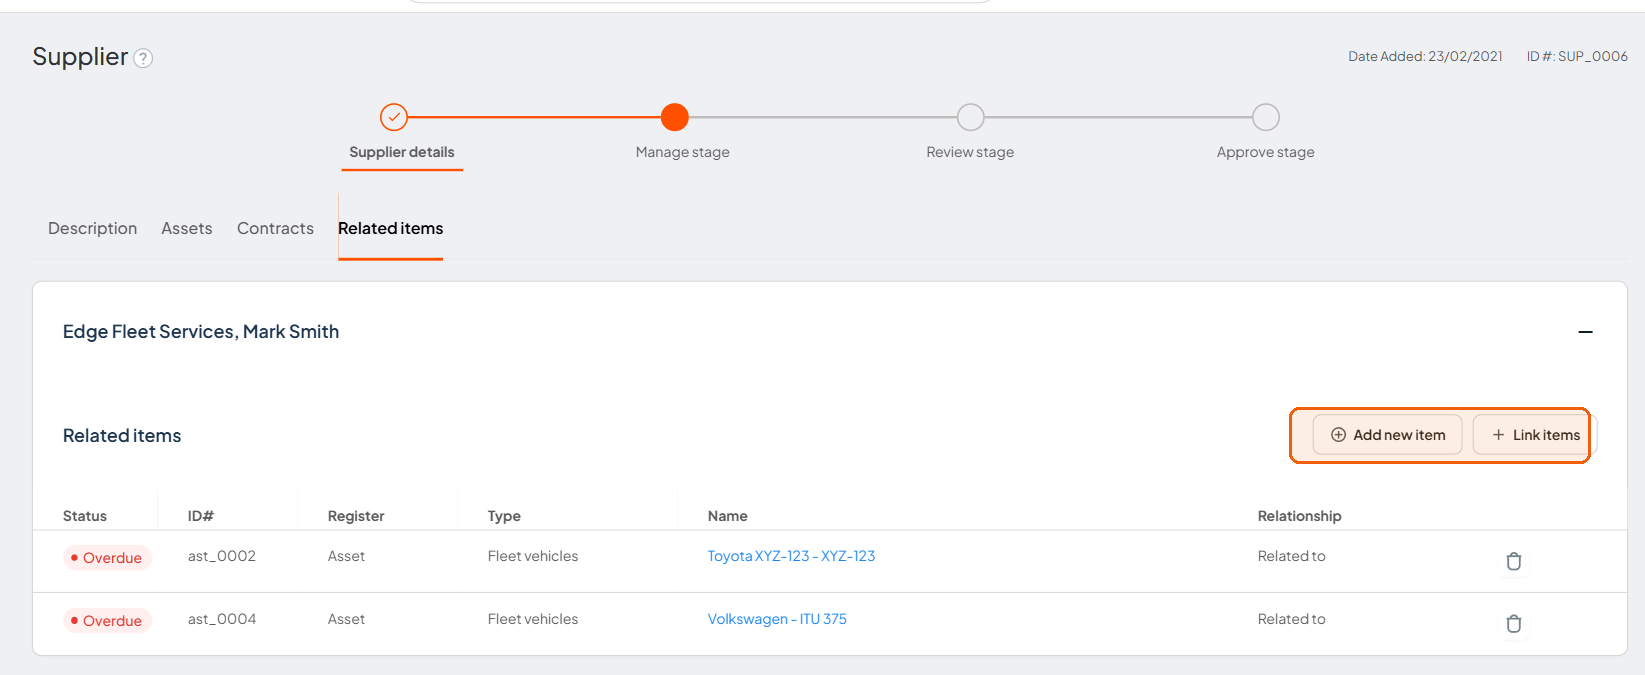
Add new item or Link items from the Related items tab.
Anything created through the top-bar Create button also appears here, alongside items linked directly from this tab.
After the supplier is first saved, this section provides a chronological record of changes and workflow events. It also includes links to related items created through the top-bar Create button.
Expand an event when you need to see more information about it.
What happens next
The Supplier manager checks the record
The manager can delegate a review, reschedule it, or escalate the supplier for approval.
The Supplier owner approves the supplier
Once approved, the supplier is published to the active Supplier register.
The next review is scheduled
The review date triggers a future task so supplier performance can be reassessed.