What is an incident?
An incident, near miss, or hazard refers to any event or situation that has the potential to cause harm, damage, or disruption within your organisation.
An incident is an actual event that has occurred, while a near miss is a close call or a situation that could have resulted in harm but did not. A hazard is a potential source of harm or danger that could lead to an incident or near miss if not addressed.
Why report an incident?
Reporting incidents, near misses, and hazards is crucial for your organisation to ensure safety is appropriately managed, identify areas for improvement, implement corrective actions, and prevent future occurrences. Reporting faults also drives decision useful trend reports which are available in the Analytics section of the platform.
Permissions required to report an incident
You will need the following permission to report an incident:
- Report incidents (minimum licence type required - Read Report)
How to add an incident
Click on the create button and select Incident to start an incident report. Then follow the instructions in each of the sections below:
![]()
- Incident details
Describe the incident. - Persons involved
List the people impacted and involved in the incident. - Related or damaged assets
List any equipment or assets impacted by the incident. - Identified issues and improvements
Add any corrective actions or improvements you think should be considered to help prevent the incident from happening again. - Assign
Select who should receive your report and manage what needs to be done. - Access control
Select the teams and/or individuals who should be able to view the report. - Attach records
Upload any relevant records relating to the incident. - Submit your report
- System event history
A chronological record maintained by the system detailing entries and changes made to the form including links to any related items created by users.
Incident details
In this section, you describe the incident, near miss, or hazard. See below for a description of what's required in each field.
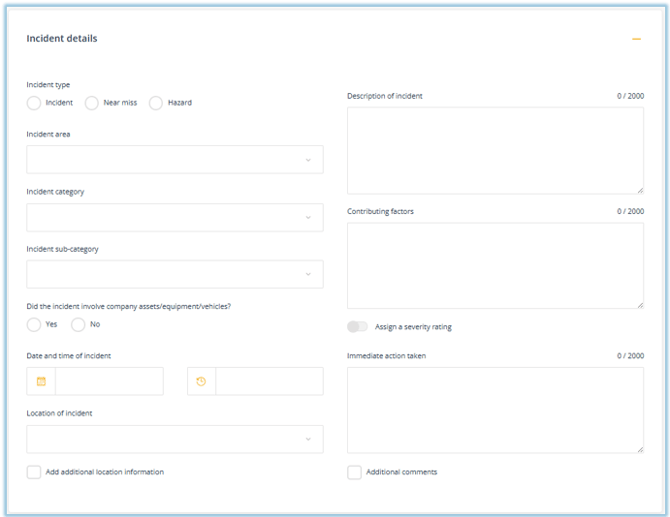
Incident type
Select the type of incident being reported. An incident is an actual event that has occurred, while a near miss is a close call or a situation that could have resulted in harm but did not. A hazard is a potential source of harm or danger that could lead to an incident or near miss if not addressed.
Incident area
Select the area of your organisation that the incident relates to.
Incident category and sub-category
Select the primary category that best defines the incident. This will reveal an additional sub-category menu where you can select a more specific category for the incident.
Did the incident involve company assets/equipment/vehicles?
Indicate if assets or equipment were impacted by the incident. If you choose 'yes', additional fields will be revealed further down in the form for recording specific details of the assets involved.
Date and time of incident
Please indicate the actual or estimated date and time of the incident. The date field will automatically display 'today's' date, but you will need to fill in the Time field manually.
Location of incident
Select the location within your organisation that the incident relates to.
Description of incident
Describe the incident eg. 'Medication dispensing unit dispensed incorrect dosage to post op clients.' You can add up to 2000 characters (300-500 words). Use the Additional comments field to add further information or upload or documents, emails, or photographs using Attach records.
Contributing factors
Describe the factors that you think contributed to the incident occurring. This helps to identify and address what needs to be done to prevent future occurrences. Contributing factors can include human error, lack of training, inadequate procedures or protocols, equipment malfunctions, communication breakdowns, and even external factors such as environmental conditions.
Assign a severity rating
The severity rating (often know as a SAC score) is a numerical score to rate the severity of the event. The score is typically based on the impact of incident, particularly when an injury occurred.
When you choose a severity rating, a recommended response will appear. To check that you've selected the most appropriate rating, click on the Guide button once you've selected the rating.

This field can be edited after the item is closed. The 'Edit closed items' permission is required.
This field can be configured to be a required or optional field. Learn more here
Immediate action taken
Describe what action you or others took when the incident occurred eg. 'Standard operating protocols were followed in full and relevant parties we notified.'
Go to top
Persons involved
In this section you can enter the details relating to each person involved in the incident. Enter the details for one person and click OK. This process can then be repeated to enter multiple people.
Each person listed will appear as separate line items on the Persons involved tab on the Incident register which can be searched and filtered for generating reports.
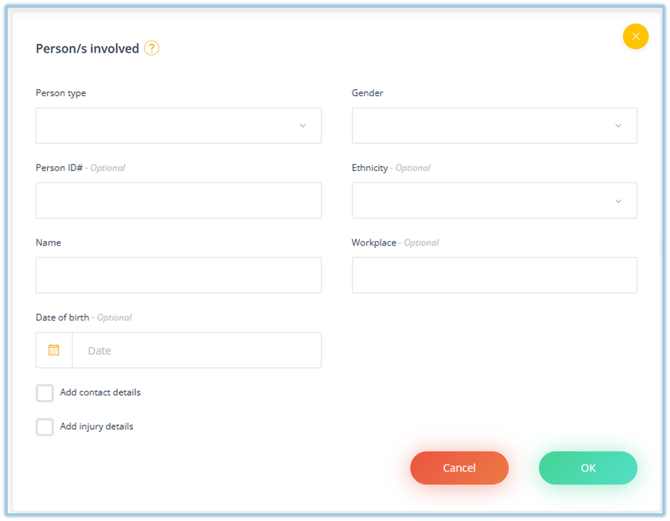
Person type
Chose the category the best describes the person and their relationship to your organisation.
Person ID#
Type the ID# of the person if this is available and required. Note: This field becomes optional if a name is entered. This can be useful if strict privacy conditions are appropriate. Note: If an ID is entered, the Name field will become optional.
Name
Type the name of the person. Note: This field becomes optional if an ID# is entered. This can be useful if strict privacy conditions are appropriate. Note: If a name is entered, the ID field will become optional.
Date of birth (optional)
If required, record the person's date of birth.
Gender
Select from the available options.
Ethnicity
Select from the available options. Note: Start typing in the field to activate progressing search. You can search on item or item code.
Workplace (Optional)
Record the workplace or organisation the person is associated with if this is relevant or if the person is a representative of an organisation.
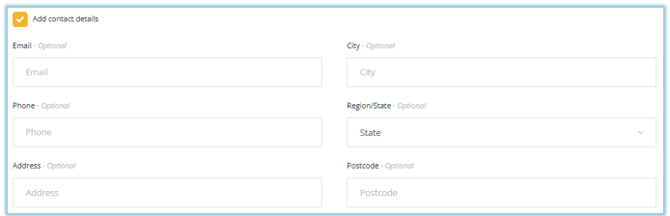
For each person added, you can also include their contact details and information about any injuries they may have sustained related to the incident.
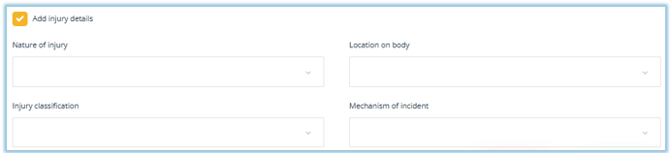
Nature of injury (Type of hurt or harm sustained)
The nature of injury/disease classification is intended to identify the type of hurt or harm that occurred to the worker. The hurt or harm is generally physical, although the classification also includes categories for mental illness.
Location on body (Bodily location of injury)
The bodily location of injury/disease classification is intended to identify the part of the body affected by the injury or disease. For certain types of diseases, the bodily location is necessary to provide more precise information on the nature of the disease.
Mechanism of incident (How the injury happened)
The "mechanism of incident" refers to the specific action, exposure, or event that directly caused an injury or disease. It's essentially "how" the injury happened, helping to understand the circumstances surrounding the incident. For example, if a person falls from a ladder, the mechanism of incident would be "fall from height", or if a patient had an adverse reaction to medication, the mechanism of incident would be “Medication error’. This information is crucial for injury prevention, risk assessment, and understanding injury patterns within a workplace.
Injury classification (Treatment type)
The Injury classification broadly classifies the treatment or response required such as whether first aid or more serious medical treatment was required, of if no treatment was required but the person needed to take time off work. In Health and Safety, injury treatment can range from basic first aid to advanced medical care. First aid includes immediate treatment of minor injuries like cuts, burns, and bruises, often administered by trained individuals on-site. Medical treatment, however, involves more extensive care by healthcare professionals like doctors or nurses, including procedures, medications, and rehabilitation. Examples:
- Lost time injury (LTI) is a workplace injury or illness significant enough to require: admission to hospital; the next full scheduled day of work missed, is the result of an event, and is outside the control of the WHS management systems of the University. An LTI is not an aggravation of pre-existing injury.
- Medical treatment injury (MTI) is an injury or illness, significant enough to require treatment by a qualified medical professional (for example a doctor). Treatment at this level begins with a stich/suture or a prescription.
- First Aid Injury (FAI) is a minor injuries that can be managed with basic first aid techniques, such as cleaning minor cuts, applying bandages, or treating minor burns.
- No Treatment Injury (NTI) An injury that does not require medical treatment from a doctor or other healthcare professional beyond basic first aid.
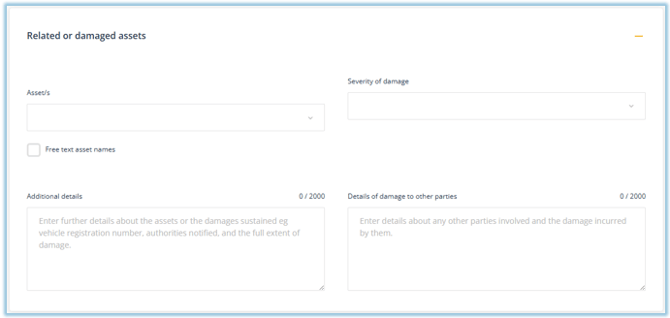
Related or damaged assets
If you indicated in the Incident details section that damage to assets or equipment has resulted from the incident, this section will appear for you to complete.
In the Asset/s field you can choose from a list of assets in your organisation. You can select multiple items. If the relevant item is not in the list, select the free text option to describe the asset.
Identified issues and improvements
Click Add to suggest any improvements or corrective actions that should be considered to help reduce the risk of a similar incident happening again. Corrective actions should be coded as a 'non-conformance' in the Improvement type field.

When you submit the incident report, the corrective actions and improvements created here will automatically appear in the Improvements register and be assigned to the person who was identified to manage the issue.
If you have the permission to 'Edit closed items', you can use this component to create new improvements even after the item has been marked as closed.
Assign
Specify who should receive the incident report. This person will receive a task to manage the next steps. Additional people who should be notified can also be selected.
Note: In some cases, these fields may be pre-populated by business rules created by a system administrator.
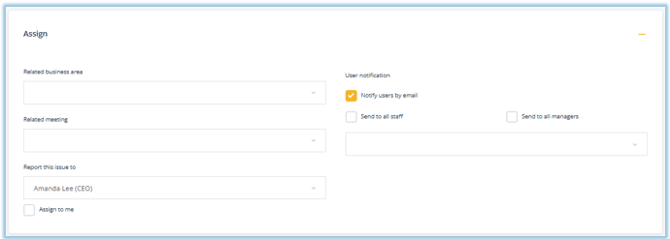
Related business area
Select the business area in your organisation that the issue relates to or occurred in.
Related meeting
Select the team meeting responsible for monitoring the management of the event. This will automatically place the event on their meeting agenda.
Report this issue to
Select who is responsible for managing this type of issue. Only users with permissions to manage events will be displayed. The user selected will be notified immediately of the incident and will be assigned the task to manage the incident.
If you will be the person managing the event and you have the required permissions, select Assign to me. The Submit button will change to Next allowing you to advance directly to the next stage to manage the event.
Notify other users by email (optional) - Select who needs to receive an email notification about the event.
Note: Users sent notifications relating to the incident will need to be included in Access control to see the incident.
Access control
Set which users will have access to view the incident report. You can grant access to all users or specific teams and individual users.
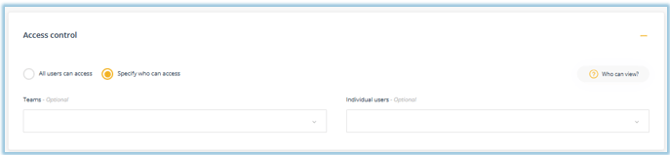
All users can access
Select this option if you would like all users to be able to view the item.
Specify who can access
Select this option to control which users can view this item.
Teams
Select the team/s who need to view the item.
Individual users
Select specific users (if they are not included in the selected team/s) who need to view the item.
Who can view?
Click this button to see a list of users who can see the item based on your selection. The list will also include those users assigned to the item in the workflow. Note: Users with system level permissions to see all items will also be included.
Attach records
This component enables you to attach records relating to the issue such as correspondence, emails, or photographs. Only users with permissions to see the item will be able to see attached records.
Click Attach to add a record.
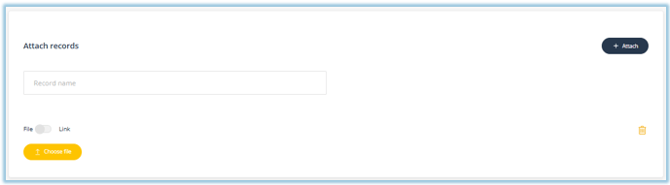
Record name
When naming the record ensure the description is meaningful. For example, 'Photograph of damaged to vehicle XYZ 123'.
File or Link
Click on Choose file and navigate to the record on your computer. If you have links enabled, toggle to change the control to add a URL to the record. The URL must be a in a web format (https://) or Microsoft Sharepoint format (https://<company>.sharepoint.com/...)
Go to topSubmit or save as draft
The green Submit button will save the form and progress the item to the next stage of the workflow. After an improvement is reported, it will progress through a series of workflow stages for management, response, and eventual closure. Learn more about workflows.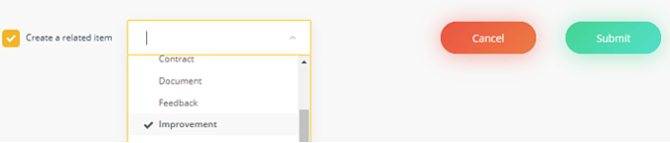
Select Create a related item if you want to create a separate linked item on another register when you save the form. A link between the two items will be displayed in each item's System event history. This may be useful when you want to suggest an improvement in response to the improvement.
Saving a report as a draft
- Complete the Description field. You must fill in the Description field at a minimum. The remaining fields on the form can be completed later before you submit the item.
Note: Business rules are applied to draft items so a number of fields may be automatically populated as you complete the form. This will not affect your access to return and complete the draft. - Click 'Save as draft' located at the bottom of the form. Users you specify in the ‘Report to’ or ‘Notifications’ fields will not receive any notification of a draft item.

Accessing your draft report
- Once saved, your report will appear in the Draft tab on the register. You can find this tab when viewing the register.
- For quick access and as a reminder of incomplete reports, links to your draft items are displayed in the Drafts notification button in the header bar, located at the top-right section of your platform.
Submitting your draft report
Open your draft report and complete the required fields including any relevant attachments. Then click Submit to send your report to the person you’ve specified. Any additional email notifications to people you’ve specified will also be sent at this time.
Go to topSystem event history
The System event history will be displayed once the incident is reported. It's a chronological record maintained by the system detailing entries and changes made to the form including links to any related items created by users.
Click the '+' control on the right to expand the line item to see more information.
