What is a contract?
Contracts stored in the Contract register are formal agreements that require regular review or renewal such as funding agreements, MOU's and supplier contracts.
Why manage contracts in Logiqc?
Contract management is vital for ensuring compliance with legal obligations and mitigating financial risk in your organisation. A controlled process of review also helps to ensure staff are accessing the correct and latest approved version of a contract.
The contract management workflow
When a new contract is added to the Contract register, it will progress through the workflow specified in the Workflow component and ultimately be approved by the Contract owner at the end of the workflow cycle.
Permissions required to add a contract
You will need the following permission to add a contract:
- Add contracts (minimum licence type required - Action)
How to add a contract
Complete each section of the Contract details form highlighted below. Click the links to learn how to complete each section.
- Contract details
Describe and categorise the contract and set the review and expiry dates. - Funded programs (Optional)
List the programs funded by the contract. - Related risks (Optional)
Assess the risks to the organisation associated with entering (or not entering) into the contract. - Financial details (Optional)
Record contract value and set payment schedule. - Assign
Select the Contract owner. - Access control
Select the teams and/or individuals who should be able to view the contract. - Workflow
Program the workflow stages to manage, review and approve the contract. - Upload contract
Chose the file to be uploaded to the platform. - View contract
Preview the published version of the contract and any draft versions in the workflow. - Add new version
Upload a new version of the contract to replace the existing version. - System event history
A chronological list maintained by the system of most entries, changes, and linkages made in the system in relation to this document.
Contract details
In this component you'll describe and categorise the contract, and specify the date the contract is to be next reviewed.
Note: The Contract details form comprises tabs for creating and managing related items. Learn more about tabs here


- Contract name
Enter the title of the contract. - Contract ID number (optional paid add on feature)
Enter a contract ID# in line with your organisation’s policy. The ID must be unique (no duplicates with other contracts) and can be up to 12 characters in length. - Contract type
Select the type of contact, e.g.. Funding contract. - Contract number (optional) - enter the contract number if applicable.
- Keywords (optional)
Data in this field will be referenced when you search for items in the platform. It can be useful to add common terms people might use to search for the item, especially if the title is not familiar. - Other party
Enter the name of the other party to the contract. The menu displays people entered on the Contacts register such as suppliers and hey organisational contacts. If the other party is not in the list you can either enter them onto the Contacts register or simply free-type their name. - Contract purpose
State the purpose of the contract. - Contract start date
Select the start date of contract. - Contract review date
Select the review date of the contract. This is the date that will trigger a task for the Contract manager to review the contract. - Contract expiry date
Select the contract expiry date. If the contract does not have a specific expiry date, select the option No expiry date (expiry date cannot be left blank without selecting the No expiry date option). - Additional comments (optional)
Enter additional comments relating to the contract. For example, comments relating to contract variations could be entered here.
Funded programs (optional)
Enter the names of programs or services that the contract provides funding for. Use the menu to select a the person responsible for the program. To remove a program, click on the trash can icon.
 Go to top
Related risks (optional)
Enter an assessment of the risks to the organisation associated with entering (or not entering) into the contract. If the Risk register is activated in your platform, you can also link the contract to one or more identified risks.

Financial details (optional)
Record financial details relating to the the contract. These values can also be exported along with a list of contracts for reporting purposes.
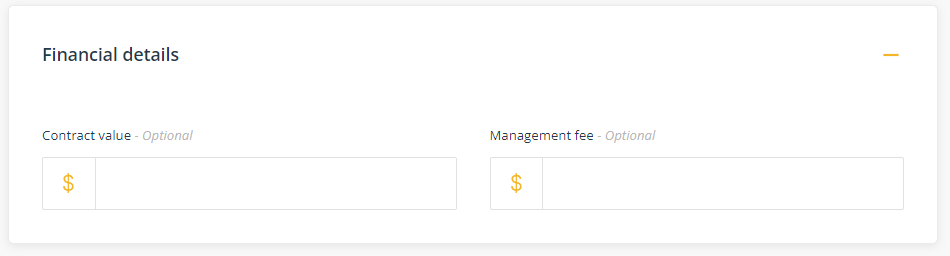
Payment schedule
Create a payment schedule to record anticipated payments over the life of the contract. Click Add to create a new payment entry and repeat to record multiple payments.
Note: the amounts in the schedule must total to equal the Contract value amount.

Payment reports
To generate a report on the expected payments per year over the life of the contract, go to Governance register reports in the Analytics page and select Contract payment schedule report. Use the filters to refine your report to the relevant contract type and select the ellipses to adjust the columns displayed.

Assign
In this component you set responsibilities for approving and monitoring the contract. These choices should align with organisational delegations relating to the management of contracts.

- Related business area
Select the business area the contract relates to. - Related meeting
Select the meeting that has oversight responsibility for the management of the contract. This is consistent with the premise that transparency in responsibility leads to greater accountability. - Contract manager (only applies to legacy platforms)
Select the staff member who is responsible for managing the contract. - Contract owner
Select the staff member who is accountable for the contract and has the authority to approve it being published to the Contract register. If you are the Contract owner, the Quick publish option will be available for immediate publishing of the contract when you save the form. - Notify users by email (optional)
Use this function to notify relevant personnel that the contract has been added to the system. Note: users sent notifications relating to the contract will need to be included in Viewing permissions to see the document.
Access control
Set which users will have access to view the contract. You can grant access to all users or specific teams and individual users.
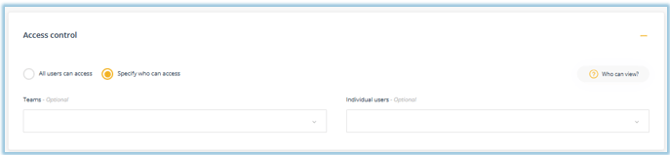
All users can access
Select this option if you would like all users to be able to view the contract.
Specify who can access
Select this option to control which users can view the contract.
Teams
Select the team/s who need to view the contract.
Individual users
Select specific users (if they are not included in the selected team/s) who need to view the contract.
Who can view?
Click this button to see a list of users who can see the item based on your selection. The list will also include those users assigned to the item in the workflow. Note: Users with system level permissions to see all items will also be included.
Workflow

Note: Earlier/legacy versions of Logiqc do not have this Workflow component. Click here to enquire about activating the Workflow Builder.
This component enables you to build a customised workflow sequence with multiple stages to match the the specific requirements for managing the contract. This is particularly applicable where multiple staff need to have input into the management of a contract prior to approval and publishing to the register.

Click +Add stage to create a workflow.
- Stage name - select the first stage in the contract workflow from the list of workflow stages. Stage names and instructions can be added by a user with administration permissions. If instructions for the stage have been pre-determined, they will display as editable content in the Instructions field.
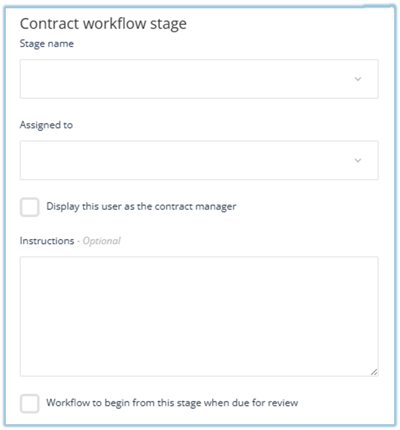
- Assigned to - select the person who has responsibility for this stage in the workflow. They will receive an email notification to complete the stage. Once completed, the contract will move to the next person in the stage.
- Display this user as the contract manager - selecting this will assign the person as the overall contract manager and display their name in the Contract manager column in the register. This will not affect the workflow. Only one person can be assigned as the contract manager.
- Instructions (optional) - edit the pre-programmed instructions if applicable.
- Workflow to begin this stage when due for review - this control enables you to create a different workflow cycle just for the first time the contract is uploaded and approved. If selected, the contract workflow will begin at this stage when the contract comes up for review.
Note: All workflow cycles MUST finish with an Approve stage. The approval stage is a mandatory stage and it can only be assigned to the person previously selected as the Contract owner. The last person in the workflow before the Approve stage will have an option to escalate the contract to the Contract owner for approval.
Repeat the above steps until all stages of the contract workflow are listed.
In the example below, two workflow sequences have been programmed with the first sequence including extra steps for legal and financial review.
A 'loop' control has been inserted to set where the workflow sequence will begin when the contract comes up for review. So, the second workflow cycle will simply begin at the Manager review stage and then proceed directly to approval.

Example Stage names and instructions:
Finance Manager review - advise if the contract deliverables can be met within the allocated funding budget.
Program Manager review - advise if our health services program has the capacity to delivery the contract deliverables. If it doesn't advise of what additional resources would be required.
Legal review - advise if the terms and conditions of the contract are satisfactory.
Upload contract
Use this component to upload a file or add a link to the contract if it's stored online in another platform.

- File or Link
Click on Choose file and navigate to the record on your computer. If you have links enabled, toggle to change the control to add a URL to the record. The URL must be a in a web format (https://) or Microsoft Sharepoint format (https://<company>.sharepoint.com/...)
View contract
In this component you can preview the published version of the contract and any draft versions in the workflow. A brief overview of document management details is also provided. Note: This component is only displayed after a document has been uploaded for the first time.
Select the Email link button to send a link to the page to another user via email. Recipients will require a Logiqc user account to access the document.
This component can be used to upload a new version of the contract for approval or immediate publishing if you are the Contract owner.
You can only add a new version if the contract has the status of 'Approved'. If the contract is in a review workflow cycle you will not be able to add a new version.

- Send new version to the Manage stage
Select this option to send the new version of the contract to the Contract manager for review of the changes made. - Send new version to the Approval stage
Select this option if the document does not require any further review or when you are the Contract manager. - Quick publish
This option will be available if you are the Contract owner. Quick publish will publish the contract immediately.
Submit/save
The green Submit button will save the form and progress the item to the next stage of the workflow. The button label, however, will change depending on certain conditions to make it quicker to complete tasks.

- Quick publish - If you are the Contract owner, you can skip the Manage and Approve stages by selecting Quick publish. The Quick publish option will immediately approve the contract and publish it to the Contract register.
- Submit/Next - The green Submit button will save the form, upload the contract and move it to the Manage stage.
- Create a related item - If you want to create a related/linked item after the upload is completed you can select the relevant register in the Create a related item component. When you press Submit, the platform will launch a new item in the register you selected. The platform will display a link between the two items in the System event history.
System event history
The System event history is a chronological record maintained by the system detailing entries and changes made to the form including links to any related items created by users.
Click the '+' control on the right to expand the line item to see more information.
