Quick steps to approve a record:
- Go to the Task management component
- Click on Assign to You
- Select from the option
- Complete the required fields
- Click Submit
Permissions required to approve a record
You will need the following permission to approve a record:
- Approve records(minimum licence type required - Approve)
The components of the Approve form
| Action history | A chronological list of the instructions and actions recorded to date within each stage of the workflow. |
| Task management | Your options for approving the record. |
| View record | Where you can view and download the record. |
| System event history | A chronological list maintained by the system of all entries and linkages in the system relating to this record. |
Action history
This component displays the commentary by the assigned officers at each stage of the workflow.
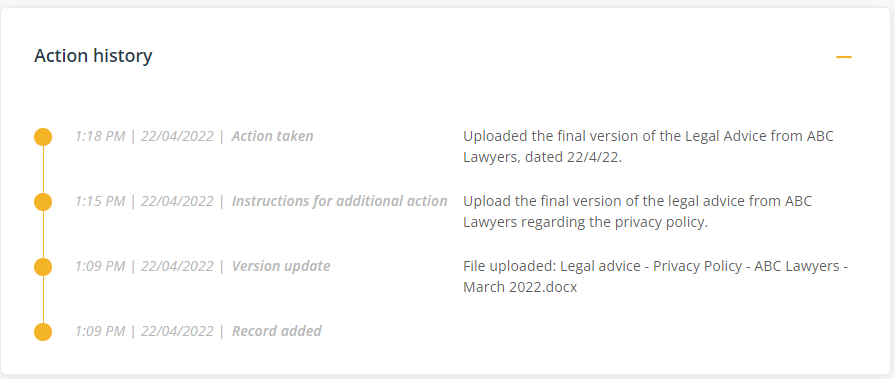
Hover over the date to display who recorded the note.
Workflow
1. When a record has been added to the Records register it will be sent to you to approve. At this stage it will be in the 'Approve stage' of the workflow as per the following diagram:

2. Prior to approving the record, if you have delegated a further task, the record will be sent back to you for approval when the task has been completed. For noting, at this stage of the workflow, it will be in the 'Approve stage' as per the following diagram:

Task management
When a record has been sent to you to approve, you have two options to choose from:
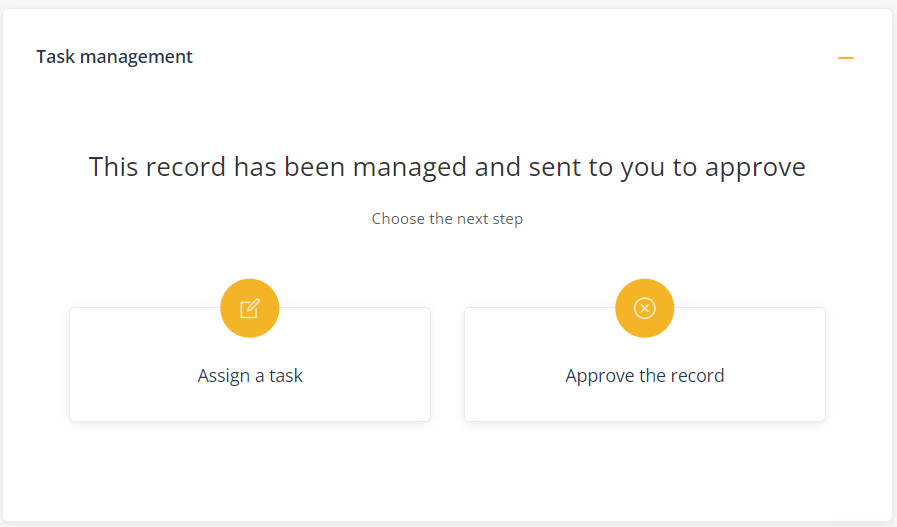
- Assign a task - choose this option to define and delegate the tasks relating to the record.
- Approve the record - choose this option to approve the record to be added to the Records register.
Task Option - Assign a task
- Task instructions - provide instructions for the task. Prior to approving the record, you can use the workflow to delegate a further task. For example, if you wanted to sure that the record is the final version you might assign a task with the following instruction: 'Upload the final version of the legal advice we received from ABC Lawyers regarding our privacy policy'.
- Assign to - select the user responsible for carrying out the task. Select Assign to me to assign the task to yourself.
- Task due date - select the date the task is to be completed by.
Task Option - Approve the record
- Additional Comments (optional) - use this field to add any additional comments relating to the record. These comments will appear in the Action history.
Submit/save the form
Select the purple Archive button when the document is to be archived and the Records details form will be moved to the 'Archived records' tab on the register.
The green button label will change depending on certain conditions to make it quicker to complete tasks. For example, The green button will change to Approve if you choose Approve the record. If you have assigned a task to someone other than yourself it will change to Submit, and if you have assigned a task to yourself it will change to Next.

If you want to create a separate related/linked item you can select the relevant register in the Create a related item component. When you press Submit, the platform will launch a new item in the register you selected. For example, if you need to schedule a compliance task for the record, you could select the Compliance option to create a new item in that register. The platform will display a link between the two items in the System event history.